How To - Creating an Invoice
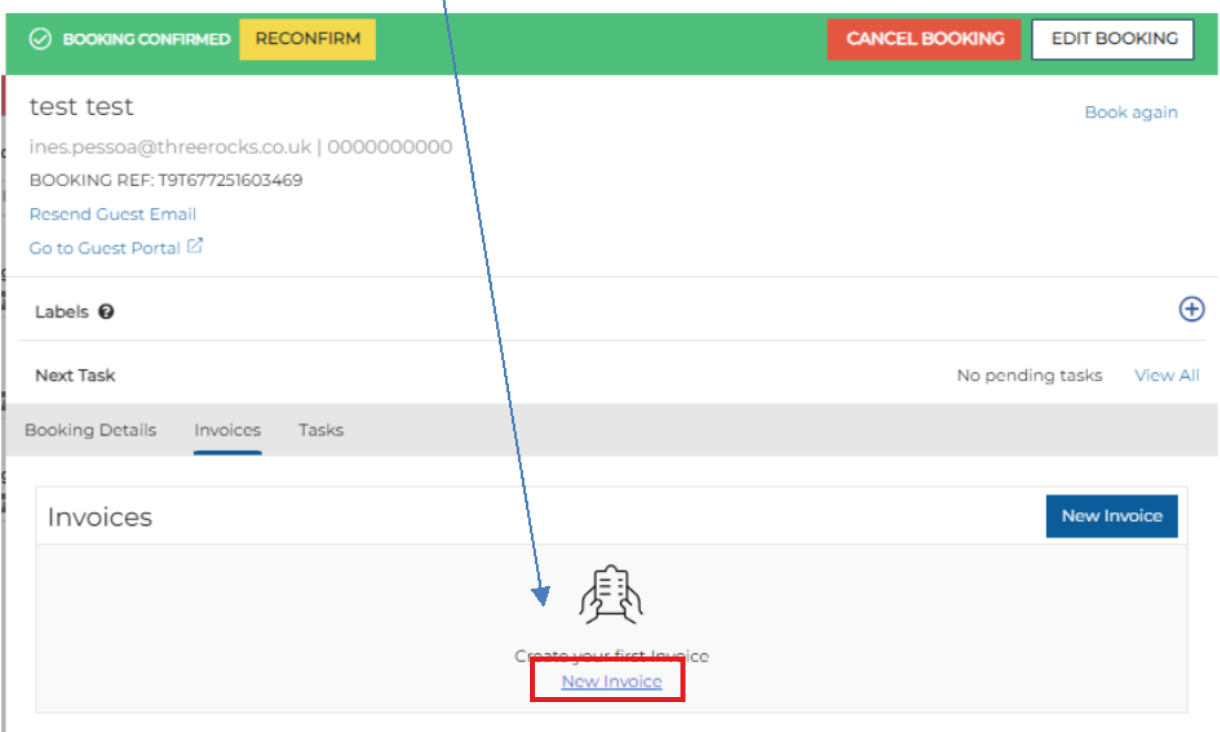
To create an invoice on the Events Host application, Host users must navigate to the Invoices tab on a booking and click on the New Invoice option:
On click, a blank invoice template is displayed to the user:
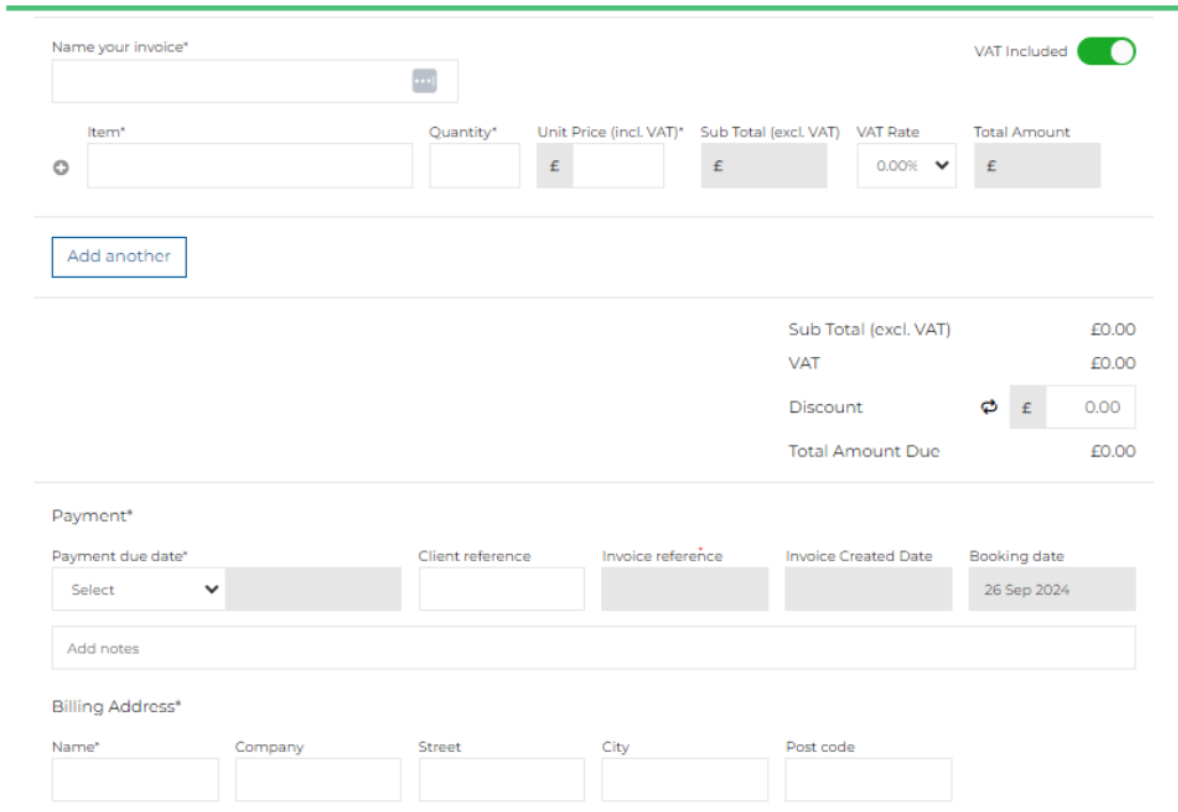
On this page, Host App users can manually insert data for the following fields:

Once complete, the user can mark the task as Done:
-
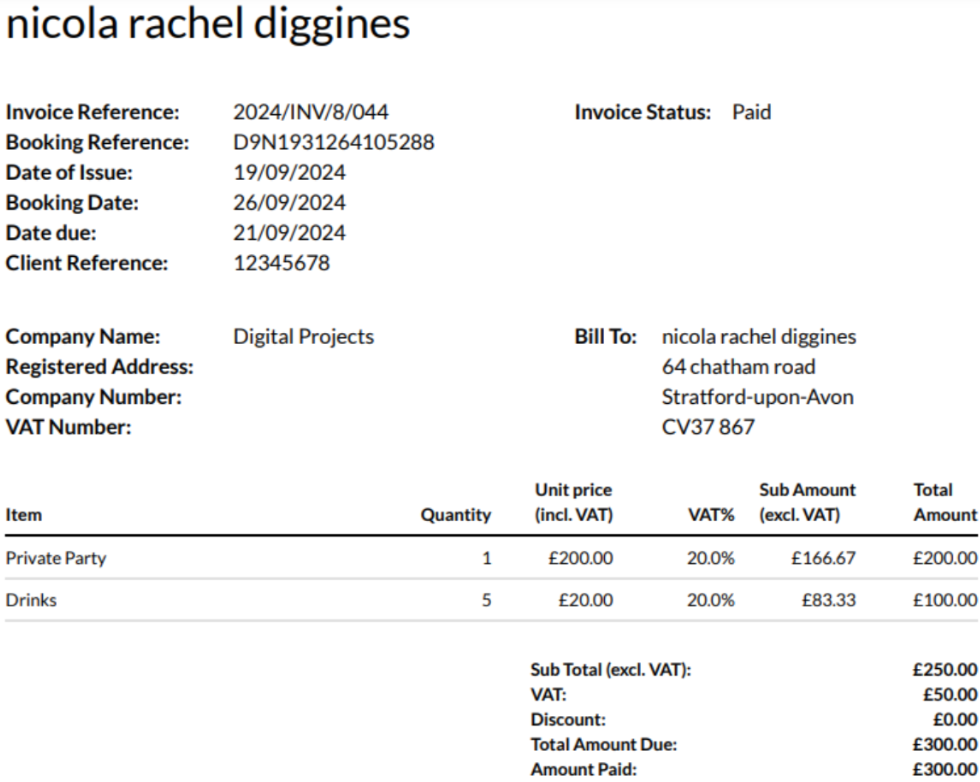
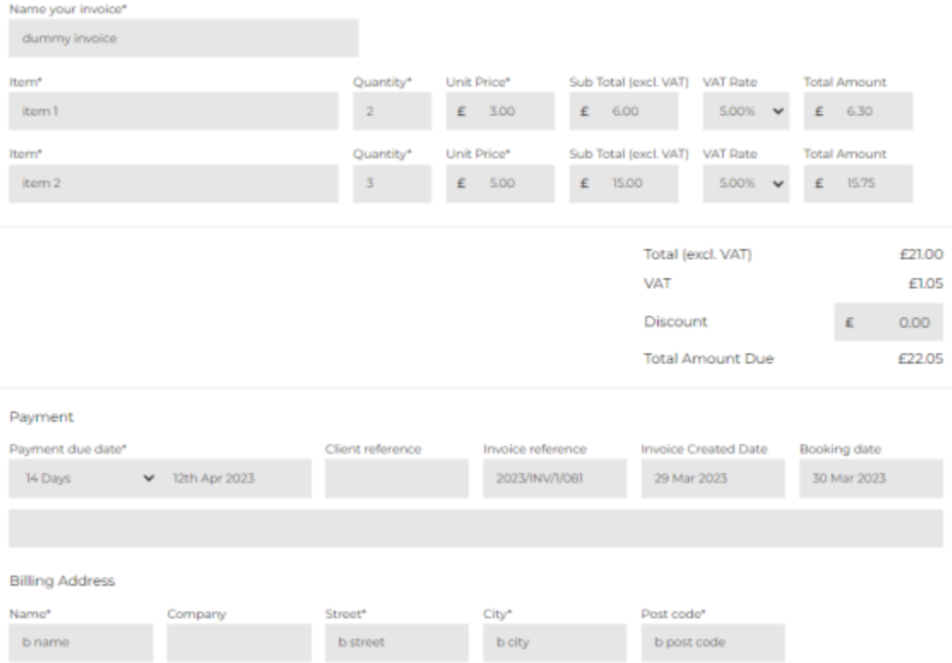
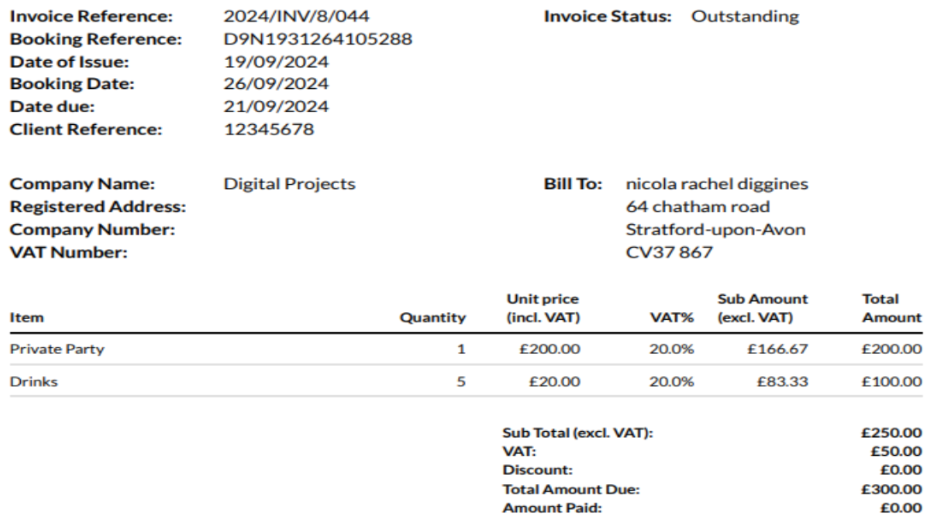
Invoice Name- this field is the header of the invoice. It is a mandatory field and has a character limit of 50 characters maximum, and 1 character minimum
-
Item - this field is the name of the product (item) on sale (e.g. menu name). Users can add more than 1 item.
-
Quantity Value - this field is the amount of people associated with an item. It is a mandatory field and support only numerical values from -100000 to 100000.
-
Unit Price Value - this field is the price of an item. It is a mandatory field and supports only numerical values from 0 to 100000. It is displayed at 2 decimal points.
-
VAT Rate - these are displayed in a dropdown list format. The VAT rates available in the dropdown are configured in the invoice template configured on Events Admin
-
Sub-total (Excl. VAT) - this is automatically calculated based on quantity and unit price value per item.
-
Total Amount - automatically calculated based on the sub-total and VAT amount per item.
-
Total (excl. VAT) - automatically calculated based on the sum of all sub-total.
-
Total Amount Due - automatically calculated based on the sum of all total amount.
-
Invoice Reference
-
Invoice Creation Date - automatically generated by the system on the date which the invoice is created
-
Booking Date - based on the booking date field
Once all mandatory fields are field by the Host app user, the invoice must be saved to view a PDF version.
When the user clicks on ‘save’, all fields are locked and the invoice cannot be edited
To download the PDF version of the invoice, the user can click on View Invoice PDF button, which will automatically download the file on to the user’s device:
Once an invoice is created, the log payment option appears for the user to manually log a payment in relation to the invoice:
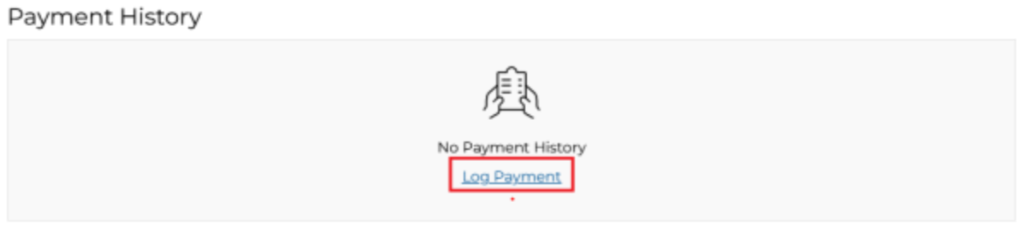
To log a payment, users can click on Log payment button and the log payment option appears
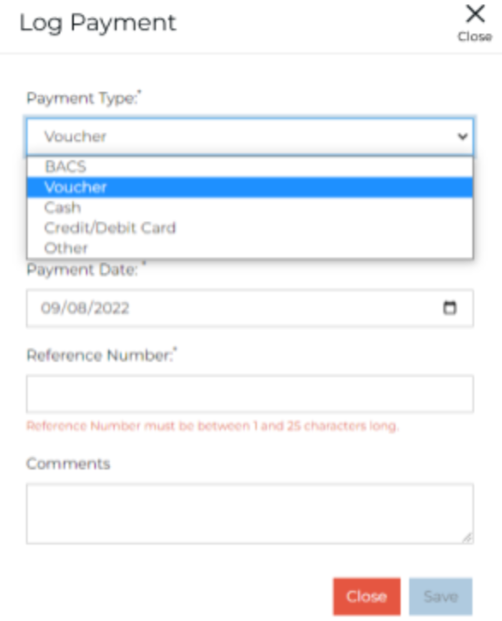
Next, the below mandatory fields need to be entered:
-
Payment Type
-
Payment Value
-
Payment Date
-
Reference number
-
Comments
Lastly, by selecting Save, a user can now view the invoice that has been paid: